- Monday, January 27, 2025
- 2 Comments

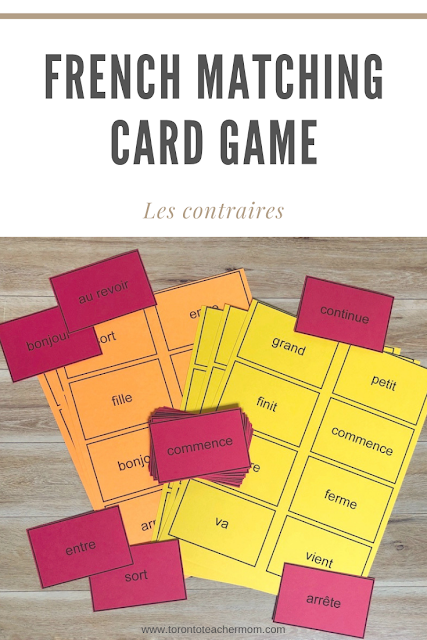
As the end of the school year approaches, I am trying to find ways to challenge my grade 1 and 2 students to demonstrate their learning with fun activities. Just last week, I updated my Dimoitou chez nous take-home kits for my three grade 1 classes. They seem to love it so far and are so eager to have their turn to take home a kit. In each kit, there is an early reader and a workbook where they each take a page to write and illustrate a silly sentence in French. I pasted a listed of vocabulary words they can use, along with a message with other activities they can try with the Dimoitou puppet I made several years ago. I also included a set of 24 word cards which contain 12 pairs of opposites. They can play a variation of Go Fish or Memory, should they choose.

I'm in the process of making a couple of kits for my grade 2 classes but in the meantime I thought I would make some class sets that students can play with during Partner/Group Work since I have a few students who have worked their way through all of the activity sheets. I am also looking at adding to the list of opposites and printing out a larger set for my older students. If you would like to download a copy of the PDF version, click here. I'd recommend using different coloured card stock for each set.
You can also download a copy of my wordsearch on les contraires.
- Monday, May 20, 2019
- 5 Comments

For Easter this year, I designed a mini book similar to le petit livret de Noël à illustrer that I made last Christmas. My students seemed to really enjoy adding their own illustrations to the story that I chose to create a similar Easter-themed mini book. I tried to stick with vocabulary that my students are familiar with based on the AIM Language method but I had to introduce some new words. For the illustrations, I used the Apple pencil and the Sketches app on my iPad. They consisted mainly of people and, in order to explore vocabulary relating to emotions and parts of the face, I omitted the facial expressions, or the head entirely. The clipart of the cross and the tomb were both free images I found online.

In class, I use the document camera that I received from IPEVO to read through my finished copy as a whole group. Then I demonstrate how to complete the illustrations while students draw in pencil. Once we've completed all the illustrations, I invite them to trace over their drawings in a thin black marker or pen, erase any pencil marks and then colour everything in.

If you're interested in downloading a free copy of L'histoire de Pâques, click on the thumbnail above. To learn how to fold it, check out my Mini Book Tutorial.
- Monday, April 15, 2019
- 0 Comments

Working as a teacher for the past 17 years, I have taught many different subjects, from kindergarten to grade 10. When I started teaching French nearly 15 years ago, I was so grateful to be teaching what I loved most. The problem was that I was never happy. I was always staying up late, sometimes until 4 am, creating my own French worksheets and flashcards because I wanted to customize them exactly the way I wanted them to be. And still, I found myself always reinventing my program and myself. It wasn't until I dived into the AIM method two summers ago that I began to feel a sense of contentment. I started to finally feel successful because my students felt successful in being able to express themselves in French. Mind you, I still spend a lot of time creating my own complementary materials, such as interactive SMART Notebook activities, DIY magnetic words and mini books, to further engage my students. But I thoroughly enjoy it. The one thing I struggle with is leaving plans for an occasional teacher whenever I am away because my program is heavily based on oral communication and gestures. Quite often the OT does not know French well enough or, as is in 100% of the cases, they do not know the AIM gestures or the method in general.
The other day, I had to leave plans and, while I normally leave instructions for students to continue working at their own pace on their activities and ask the teacher for the next activity sheet when done, I wasn't so sure about the whole thing. Most of my students are now at a point where the activities are becoming more difficult and I want to be there in person to support them. So instead, I opted to leave something easier but that also gives them a bit of a break from their regular activities. And besides, who doesn't love a good word search, am I right?
Below is a copy of the one I created for my grade 2 students who are working on a level 2 unit. I chose to add a layer of difficulty by tasking them with finding the opposite of the words in the word bank. They know these pretty well thanks to "La danse en action" videos I play to give the kids a brain break. I designed this word search in Google Docs by inserting a 12 by 12 grid and adjusting the table properties so that the cell dimensions were square, making sure to centre the vertical and horizontal alignment of the cells. The title was created via a Google Drawing where I used Word Art and the "Luckiest Guy" font. I was so happy with how it turned out, I look forward to using it as a template for different and more complex word searches. If you like it, too, click on the thumbnail below to download a free PDF copy.

- Wednesday, April 03, 2019
- 2 Comments

With only one week left of school, I wanted to do an activity with my students that they could take home for the holidays. I have been meaning to create a mini book that they can practice reading with their family and I finally finished one. It's certainly not my best writing. I had to keep it simple since I wanted to use words that my level 1 AIM students would be able to read, in particular my grade 1 students. Words that will be fairly new to them are pôle Nord, père Noël, renne Rudolph, et carotte but they are pretty straightforward in terms of meaning. We will just need to work on pronunciation. Ideally, they will work on this all week as I want them to take their time with the illustrations. I've added some images to help out and even erased parts of Santa's and Rudolph's faces so we can review the French words for nose, mouth, happy and sad, for example. Here is my fully illustrated sample:

Before we even begin folding it into a mini book, I plan on coaching the whole class through the illustrations one page at a time, practising additional vocabulary that is not in the text by directing them as follows: "On doit finir le dessin du père Noël. Tout le monde, dessine la tuque sur sa tête, le manteau et la mitaine." And then I will invite them to provide their input: "Qu'est-ce que le père Noël dit?" for example.

For the next two pages, I can already predict many of my younger students will complain that they cannot draw the same way that I did so I will model a much simpler version of Santa. What I will stress, though, is the importance of drawing the line of horizon (which I will simply call la ligne) on most of the illustrations since it helps to separate le ciel en haut and la terre en bas.

Once we have finished illustrating the pages using pencil, then they will be able to colour.

And then we learn how to fold and cut along the dotted line in the centre. This is where it gets tricky so I will likely come around and cut for the grade 1 students once they are done folding.
If you'd like to try this petit livret, click on the thumbnail below to download a copy.

UPDATE: I've created a slightly modified version in the hopes that each page will be better centred and not cutoff when folded, given that the proportions might be a bit off depending on how your printer adjusts for borderless printing. It also more clearly shows the dotted line where you are required to cut in the centre. Here is the modified version of Le père Noël mini book:

Should you require a tutorial on how to fold the mini book, let me know in the comments below and I will post one on the blog.
Update: Here is a step-by-step tutorial on how to fold the mini book.
Should you require a tutorial on how to fold the mini book, let me know in the comments below and I will post one on the blog.
Update: Here is a step-by-step tutorial on how to fold the mini book.

- Saturday, December 15, 2018
- 3 Comments

Last month when my summer break first began, I attended the AIM International Summer Institute in Niagara Falls and had an amazing time connecting with French teachers from across Canada and the U.S.A., and even as far the Netherlands and Australia. It was an invaluable professional development opportunity and I thoroughly enjoyed learning from other language teachers, both new and experienced, as well as listening to our keynotes and presenters. During the plenary session on our second day, we listened to a presentation on AIM and the CEFR with Jennifer Moodie, an FSL teacher on special assignment with the TVDSB. She clearly outlined how the Accelerative Integrated Methodology integrates so seamlessly within the Common European Framework of Reference and shared many humorous insights into her French teaching practice to which I could so easily relate. At the end, she shared a number of tips for the FSL classroom that I felt were so fabulous, I was compelled to create a sketchnote sharing my favourites. Plus, it was the perfect excuse to put my new iPad and Apple Pencil to the test.
Though these were shared with AIM teachers in mind, I feel that they could benefit any FSL or foreign language teacher. Here are my top 10 favourite tips for the FSL classroom from Jennifer Moodie's list, along with some insights into my personal experience as a second-year AIM teacher that I hope you will find helpful:
- Always speak French. This one is obvious but so often overlooked. Students won't learn French if the teacher speaks English all the time. But if they are immersed in it, they will have very little choice in learning it in order to express their needs. My mistake? Speaking at a level that was way beyond what they could comprehend. This is why I love AIM so much, since students quickly learn basic pared down language full of high frequency words with which they can express themselves and understand others. I also make a point of communicating with other staff members and visitors en français in front of the students, even outside of class and during recess.
- Exaggerate facial expressions and tone of voice. This helps students to understand what you are saying, especially when introducing new words or to differentiate between questions, exclamatory and declarative statements. I tend to liken it to miming, where a mime relies heavily on facial expressions to convey meaning.
- Ask questions containing the answer. When students are given possible choices within a question totale, they feel more confident to answer because they know one of the options will be correct and they will have less of a chance of getting it wrong. Vicky Mercier, a wonderful FSL teacher here in Toronto who uses the AIM methodology, shared an additional tip with me: If you ask a total question such as, "Est-ce que le ciel est jaune ou bleu?" where the correct answer is the last option, students will have a greater chance at getting it right because they tend to select the last option they hear. For beginning learners who worry about making a mistake, this is a great way to boost their confidence and thereby encourages them to take risks later on.
- Model and scaffold in abundance. I am fairly confident that many FSL teachers do this already and do it well. But what I would like to emphasize is that, when scaffolding, we need to meet the needs of the individual student where they are and provide the necessary supports regardless of ability. So often I would expect students to, more or else, keep up the pace and do each activity as assigned. For students who struggled to do so, I would adjust the activity to lessen the complexity or difficulty. But what about the students who finish early because they find it too easy? In the past, I couldn't possibly fathom having students move ahead to the next lesson without my teaching the whole class how to do it first. With AIM, the activities are structured in such a way that scaffolding is almost effortless and I feel confident that students who need more of a challenge can continue at their own pace.
- Give plenty of time to practice. The way AIM lessons are structured, students are given time during each class to work with a partner or within their group to complete an activity and practice their oral French skills. This is great way for students to consolidate their learning based on the lesson(s) of the day since they love talking with their friends.
- Emphasize verbs and teach them horizontally. We all know that a sentence is not a sentence if it doesn't have a verb and yet, when I used to teach using a more thematic approach, I would give students vocabulary lists full of nouns. When students have a repertoire of verbs and know how to use them in context, they can pretty much talk their way around any nouns they may not yet have learned. (See tip #9.) For example, if they forget the word for "pen", students can say, "Je cherche une chose qu'on utilise pour écrire." The teacher can then reply with, "Est-ce que tu veux un crayon ou un stylo?" What is meant by teaching 'horizontally?" Well, before I would teach verbs vertically ie. Je parle, tu parles, il parle. Teaching them horizontally is like teaching them within context, within a passage. You can then work on changing perspectives (ie 3rd person to 1st person) to teach/practice conjugations.
- Use choral response as often as possible. With AIM, the teacher often gestures while the whole class speaks in unison. While it tends to get loud, the benefit is that it greatly maximizes the amount of time students are speaking the target language and gives them plenty of modelling before they are sent off to practice with their peers. Even if one student asks a question during the lesson, the expectation is that the whole class responds while the teacher supports with gestures, giving the beginning sound or using visual aids. Another benefit is that students who are worried about mispronouncing words or who don't know a certain word won't feel isolated or embarrassed since the whole class is engaged and too busy to notice.
- Teach students how to ask questions. My youngest students are among the most inquisitive of all so it only makes sense to empower them to be able to ask questions. Very early on, they learn how to use "est-ce que" in front of a statement to turn it into a question. But asking questions quickly becomes a part of the daily routine, from "Comment ça va?" and "Est-ce je peux aller aux toilettes?" to asking "Où est (student's name)?" when student volunteers hand out French folders and "Combien de cartes est-ce que tu as?" when counting how many cards they earned in French class at the end of each month.
- Teach and practice circumlocution. When students have a repertoire of essential vocabulary and high frequency words, they can rely on circumlocution strategies to "talk around" vocabulary that they have either forgotten or have not yet learned. While using a dictionary could work, it isn't always practical. Instead, students can keep the conversation flowing by using words they already know to find a different way to express themselves, describe the object in more general terms or, my favourite, using opposite words. It's kind of like what they do on The
$25,000$100,000 Pyramid game show! - Use gestures and visual aids. I can't even begin to tell you how much using gestures in my classes has improved my students' comprehension levels. While gestures are not the be all and end all of the AIM methodology, it plays a huge role in ensuring that students are focussed and engaged, and are acquiring the target language. How many times do we wave to a baby and say "hi" repeatedly? It is within our nature to communicate with gestures and a baby who is first learning to talk relies heavily on gestures and other aids such as picture books to help understand the meaning of new words. Interestingly enough, there is even talk about how gestures could be used in Math class, too. At any rate, I have drastically cut down on the amount of flash cards I need. My hands are my flash cards now!
- Monday, August 13, 2018
- 9 Comments

Last June, we put together a wish list for our French department and on that list was a French magnetic poetry kit. I thought it would be a great manipulative for students to use as part of a centre, for example, but then I got to thinking that the vocabulary wouldn't be as practical for beginners since it would likely be geared more towards those who are francophone. So when I came across Avery Magnet Sheets (affiliate link) during Amazon Prime Day, I thought I would try to make my own. Printable magnetic sheets? Who knew? These ink jet magnet sheets, which are specially coated for brilliant colour, are compatible with my new Epson EcoTank 2750 and so I gave it a shot. I changed the print quality to high and I was very impressed with the result.

During Prime Day, I was so ecstatic to have found CARL RM-12 12-Inch Cutting Mats (affiliate link) for my really old 12-inch trimmer, which I haven't been able to find in-store. Plus, they were on sale. With these fresh mats, it made cutting my magnetic words sheet into strips that much easier and the cut was much neater. Then I just cut the strips into words by making small vertical cuts with a pair of scissors.

For this particular set, I tried to fit in as many of the words on the PDL Gestured Word List for the AIM Language kit I use with my grade 1 students - La poule Maboule. I managed to fit around 90% of the words on a single sheet in a Google Doc, in size 14 font. I still need to make an additional sheet with punctuation marks, several copies of the higher frequency words, capitalized words that often begin a sentence and additional conjugations and verb tenses. I printed mine in colour using a variation of the colour code used for the Montessori grammar symbols:
- light blue for articles
- black for nouns
- dark blue for adjectives
- purple for pronouns
- red for verbs
- orange for adverbs
- green for prepositions
- yellow for interjections


The Avery Magnet Sheets pack includes five sheets only so I have a feeling I'm going to buy some more during one of the Staples Teacher Appreciation Days when I can save 15% off.

I plan on using these magnetic words after introducing the "Mets les mots en ordre" activity. Initially, I would limit the words in the tin to select words with which they can formulate simple sentences. They can work in their groups during IPG (Independent/Partner/Group) work, where each day a different group gets to work with them while the remaining groups work on the activities. Once a group member creates a sentence, other group members can act it out or illustrate it on a mini whiteboard. Then I would add more words when it’s time to create "Mes phrases folles."
How to Make Your Own Magnetic Words
Materials:
- Avery Magnet Sheets
- inkjet printer (such as Canon, Epson, HP and other popular ink jet printers)
- scissors and/or a paper cutter
Directions:
- Design a table with multiple columns and rows, and type out the required words, adjusting column width as necessary. For the set I created, I created a Google Doc and used a Serif font called Bitter in size 14.
- Load a magnetic sheet into the printer, ensuring that it will print on the correct side, and print.
- Let it dry fully for a few minutes.
- Cut out the words. I used a rotary paper trimmer but it is metal which meant that the magnetic sheet wouldn't slide as easily. So I used it to make the horizontal cuts and used scissors to cut vertically.
Have you used magnetic words in the classroom? I would love to learn more about how you incorporate them and any storage ideas you might have.
- Friday, July 20, 2018
- 7 Comments

If there's one thing my students are eager for, it's going up to the board to show what they know. But they love using the interactive whiteboard even more, especially my primary students. Students enjoy the tactile component and being able to manipulate objects on the screen using their hands or the interactive markers. Plus, they are used to using touch screens, which makes the activities more intuitive. And of course, the class becomes very engaged. So I decided to make some interactive SMART Notebook activities for my grade 1 classes.

The first one is "Les phrases folles" where students create their own silly sentences. I created a bank of colour-coded words: black for subjects/nouns, blue for verbs, purple for "aime" since it doesn't require a preposition, red for prepositions and green for the objects/nouns. I enabled the infinite cloner on each word and locked them in place so all students have to do is drag the words they want to the lines below. Then, using an interactive marker, they can add any necessary punctuation and illustrate their sentence in the space to the right. Variations for older students could include a jumbled word bank to challenge students to find the right parts of speech. They can also write additional vocabulary using the markers.

For "Choisis le bon mot", I created separate text boxes for the answer choices and locked them in place but allowed for horizontal movement. As an alternative, since I added a lined paper background, students can use the interactive marker to write the answers.

Finally, I created an activity for "Mets les mots en ordre" which, similar to the activity above, uses separate text boxes and are locked in place but can be moved horizontally. I also filled in the text boxes with colour to make them look more like tiles.
You may notice that I used the bottom half of the screen for the interactive portion of the activity. This was done intentionally as my primary students cannot reach beyond the middle section of the whiteboard. Feel free to download a copy of this Notebook for "La poule Maboule". Keep in mind that you will need to have SMART Notebook installed on your computer to view it. If you do not, you can still use the SMART Notebook Express which has many of the basic features. However, it will likely affect the formatting.
- Sunday, April 15, 2018
- 5 Comments